Hickeroy Tree Drawing is a smart, efficient approach to capturing trees in a handful of confident lines. By prioritizing bold silhouettes, clean rhythm, and rapid decision-making, this method lets you translate complex shapes into expressive sketches in minutes. If you want tree drawings that read clearly from the first glance, this guide will help you build speed without sacrificing form.
In this guide to Mastering Hickeroy Tree Drawing, you’ll learn how to simplify branch networks, maintain steady line weight, and practice a workflow that yields quick, bold results. The goal is to train your hand to suggest mass, texture, and atmosphere with a few decisive strokes.
Key Points
- Adopt a bold silhouette strategy to define the tree quickly in Hickeroy Tree Drawing.
- Master a single, confident trunk and branching rhythm to keep pace with rapid sketches.
- Practice short warm-up drills to build muscle memory for quick, bold marks in Hickeroy Tree Drawing.
- Leverage negative space to enhance readability and emphasis of the tree form.
- Experiment with variations (wind, perspective, season) while preserving bold line work.
Understanding the core of Hickeroy Tree Drawing
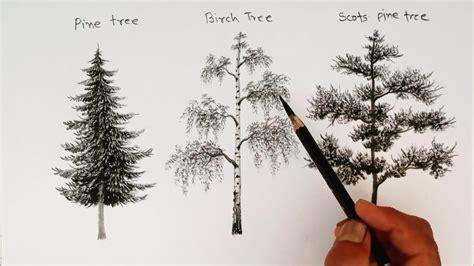
The core idea behind Hickeroy Tree Drawing is to capture the tree’s signature silhouette first. Begin with a simple trunk line and then outline the main branches with sweeping curves that communicate rhythm. This removes the pressure to render every leaf and detail, allowing you to convey structure quickly.
Materials that support bold, quick sketches
Choose a medium that encourages confident lines—an inky brush pen, a thick graphite pencil, or a digital brush with a strong flow. Use sturdy paper or a textured surface to emphasize the weight of your strokes. If you’re working digitally, set a brush profile that mimics a broad, crisp edge to preserve the bold look of Hickeroy Tree Drawing.
Practical workflow for rapid results
Step 1: Quick trunk foundation — sketch a single vertical line to anchor the tree.
Step 2: Branch rhythm — add broad, outward-curving lines that radiate from the top of the trunk.
Step 3: Bold silhouette — retrace the main lines with a stronger, deliberate stroke.
Step 4: Negative space — simplify interior lines to emphasize the outer contour.
Step 5: Variation — try different heights and densities while keeping the bold action intact.
Common mistakes to avoid in Hickeroy Tree Drawing
Avoid overworking tiny branches in early passes, which slows you down and muddles the silhouette. Don’t chase shading before establishing a strong outline; let mass and rhythm guide your instinct. Remember to maintain consistent line weight along the main shape so your drawing remains legible at smaller sizes as well.
How long does it typically take to get proficient at Hickeroy Tree Drawing?
+Most artists see steady improvement after a few weeks of daily practice. Short, focused sessions (10–15 minutes) that emphasize quick silhouettes and rhythm yield the fastest results. Consistency beats intensity here.
What materials are best for bold, quick sketches in this style?
+Paper with a bit of tooth, a pen with a strong ink flow, or a brush that holds a clean edge works well. For digital artists, a brush with a thick, opaque stroke reproduces the bold look of Hickeroy Tree Drawing, even on small screens.
Can shading be incorporated into Hickeroy Tree Drawing, or should it stay bold?
+Shading can be added, but it’s usually kept minimal to preserve the bold silhouette. When shading, apply it sparingly to suggest depth without overpowering the clean lines that define the tree’s structure.
How can I translate a real tree into Hickeroy Tree Drawing without losing its character?
+Observe the tree’s most distinctive features—the trunk stance, canopy shape, and branch rhythm. Abstract those into a few confident lines that preserve the overall mass and flow. The aim is to capture essence, not every leaf.
What are common pitfalls for beginners, and how can I avoid them?
+Common pitfalls include sketching too many tiny details early, losing the bold silhouette, and not varying line weight. Avoid these by establishing a strong outline first, keeping the line work decisive, and reserving details for later as needed.