Drawer Hidden Latch installations offer a discreet, reliable way to keep drawers aligned and secure while maintaining a clean, uncluttered look. This guide explains how to choose, prepare, and install a Drawer Hidden Latch so your drawers open smoothly and stay firmly in place when closed.
What is a Drawer Hidden Latch?
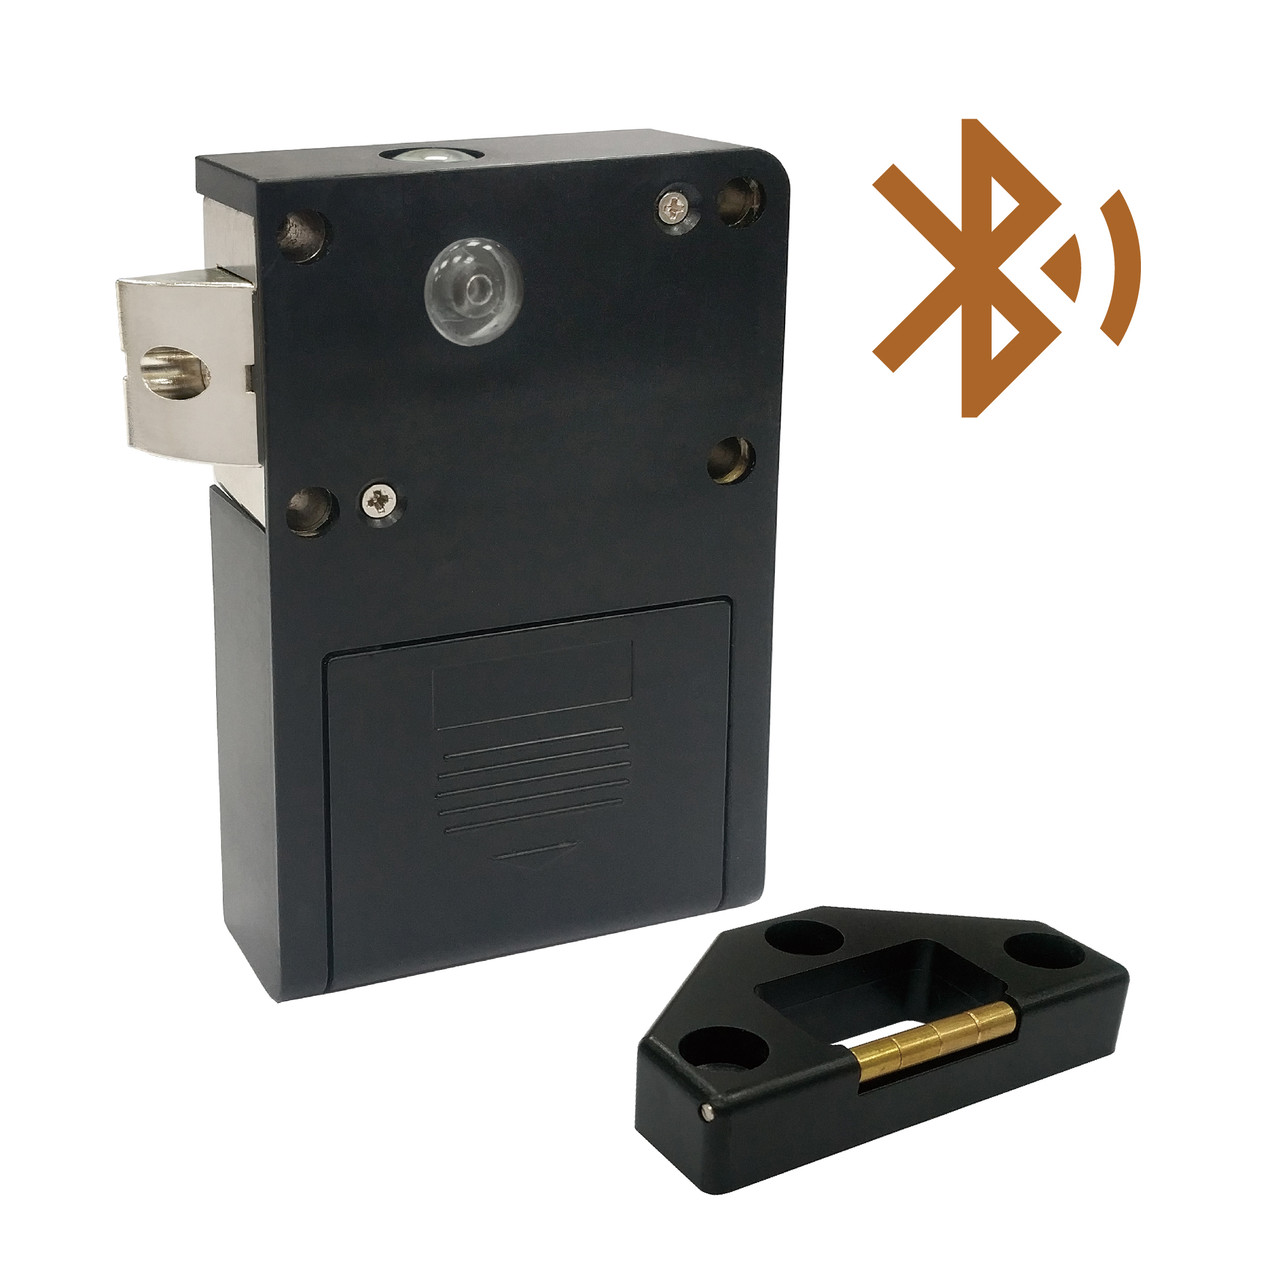
A Drawer Hidden Latch is a concealed hardware component that engages when the drawer reaches the closed position. Unlike traditional handles or visible catches, it sits flush with the drawer face and cabinet interior, delivering quiet operation and a streamlined appearance. The latch typically uses a spring-loaded striker and a matching receiver to hold the drawer shut, yet allows easy, deliberate opening with a gentle pull.
Benefits of a Drawer Hidden Latch
Using a Drawer Hidden Latch provides several advantages: a clean exterior without exposed hardware, improved security against accidental openings, and consistently smooth drawer action. When properly installed, the latch aligns with the cabinet frame for precise engagement, reducing misalignment and wear over time. It is especially useful in high-traffic kitchens, workshops, and cabinetry where durability matters.
Key Points
- Compatibility and sizing considerations for Drawer Hidden Latch components.
- Critical alignment and mounting depth to ensure reliable engagement.
- Tools and fasteners required for a clean, secure installation.
- Adjustment steps to achieve a smooth, quiet latch action.
- Common installation missteps to avoid with a Drawer Hidden Latch.
Tools and Materials You’ll Need
Before starting, gather these essentials: a drill with small drill bits, a screwdriver, a pencil, a measuring tape, a chisel or flush-trim router bit, masking tape, the Drawer Hidden Latch kit, and appropriate mounting screws. Having a caliper or ruler helps ensure precise spacing so the latch seats correctly against the strike plate.
Step-by-Step Installation
Step 1: Measure and plan. Determine the exact position on the drawer front and inside the cabinet where the latch will engage. Mark the centerline to ensure symmetry and consistent engagement for all drawers in the set.
Step 2: Check clearances. Confirm there is enough depth behind the drawer front and inside the cabinet for the latch housing, plus space for the strike plate to function without interference with any drawer slides or hardware.
Step 3: Mark mounting holes. Use the template from the latch kit or a measured layout to trace pilot hole locations on both the drawer face and the cabinet frame.
Step 4: Drill pilot holes. Carefully drill small pilot holes at the marked locations to guide screws without splitting the wood. Remove any dust from drill holes for a clean fit.
Step 5: Install the latch. Secure the latch body to the drawer front with the provided screws, ensuring it sits flush and square. Attach the corresponding strike plate or mounting plate to the cabinet frame at the marked position.
Step 6: Test and adjust. Close the drawer to verify engagement. If the latch feels stiff or fails to seat, adjust the strike position or slightly reposition the latch housing until the action is smooth and secure.
Fine-Tuning for Smooth Operation
Small adjustments can make a big difference. If the drawer doesn’t fully engage, nudge the strike plate a fraction of a millimeter, re-test, and repeat until the action is consistent. Ensure the drawer slides are clean and properly lubricated, as rough slides can mimic latch misalignment. A well-tuned Drawer Hidden Latch provides a quiet, reliable close with minimal effort.
Maintenance and Troubleshooting
Periodically inspect the latch and mounting screws for looseness, especially in environments with humidity or temperature changes. Tighten any loose fasteners and wipe away dust or residue that can impede engagement. If the latch sticks after long use, clean the contact surfaces and re-check alignment. Replacing worn components ensures continued smooth performance for years.
How do I know if a Drawer Hidden Latch is compatible with my drawers?
+Compatibility depends on drawer size, cabinet depth, and the latch’s mounting requirements. Check the product specs for mounting thickness, footprint, and supported opening widths. If your drawer front is thinner than the specified minimum, you may need a thinner-mount or alternative concealed latch.
What common mistakes should I avoid when installing a Drawer Hidden Latch?
+Common errors include misplacing the latch off-center, drilling oversize pilot holes, or failing to account for hinge and slide clearances. Also, avoid overtightening screws, which can distort the latch housing or render the mechanism stiff.
How can I test the durability of my Drawer Hidden Latch installation?
+Test by cycling the drawer 30–50 times with normal use, observing for smooth latching, consistent engagement, and no looseness. If any step feels sticky or loose, re-check alignment, tighten screws, and verify the strike plate seating.
Can I retrofit a Drawer Hidden Latch on existing cabinetry without removing the drawer?
+Yes, many concealed latches are designed for end-user retrofit. You’ll still need access to the inner mounting area and may use existing screw holes or modify the interior lightly. Take measurements carefully to ensure a clean fit that doesn’t interfere with the drawer’s travel.